
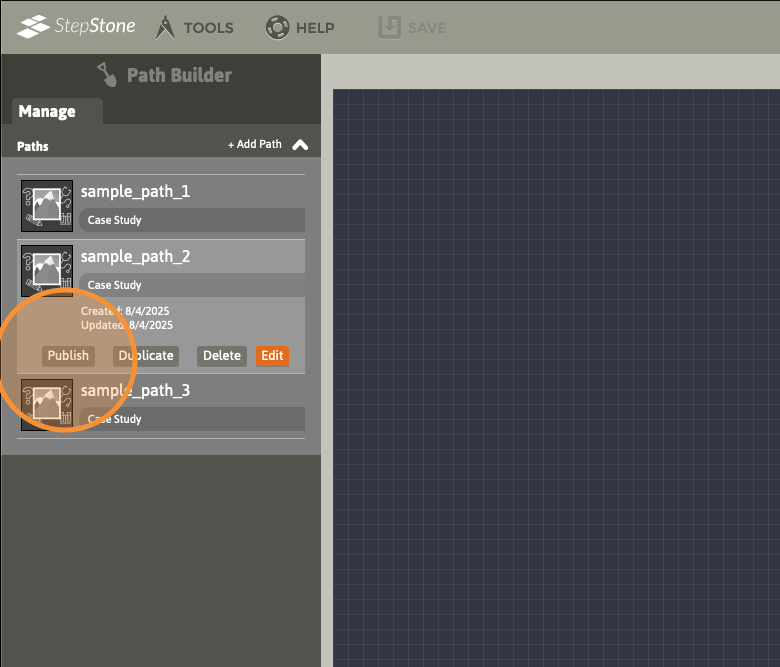
In the Path Builder, navigate to the Manage tab and select a Path. The Path does NOT need to be loaded into Edit mode in order to be published. Click the Publish button on the selected Path, which will reveal the confirmation dialog for publishing the Path.
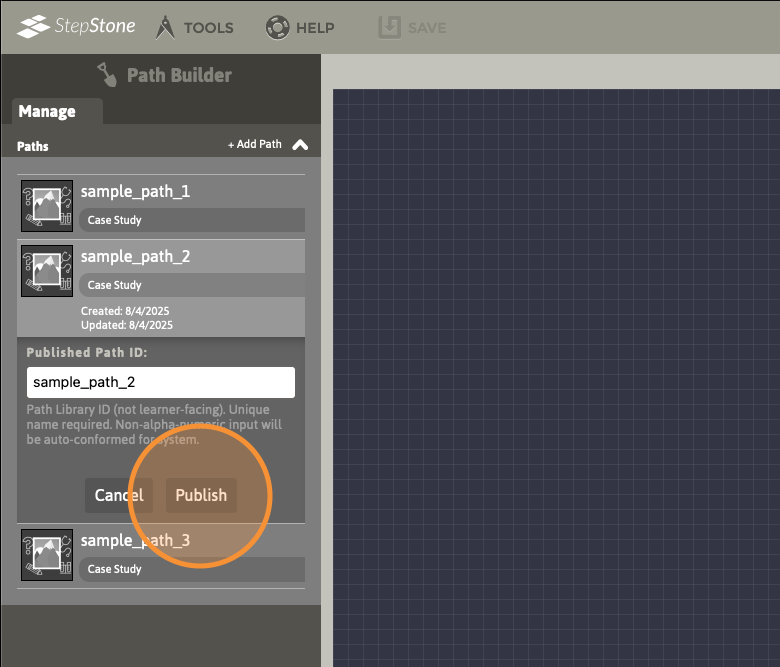
Enter a unique Path ID for the published Path, as instructed in the dialog. This published Path ID is NOT learner-facing (Paths added to a Course display their respective titles as provided in the Path’s Parameters set in the Path Builder — Path IDs are only seen at the authoring level), and can be identical to the Path’s current ID within the Path Builder. After supplying a unique published Path ID, click the Publish button in the dialog. If successful, the dialog will close.
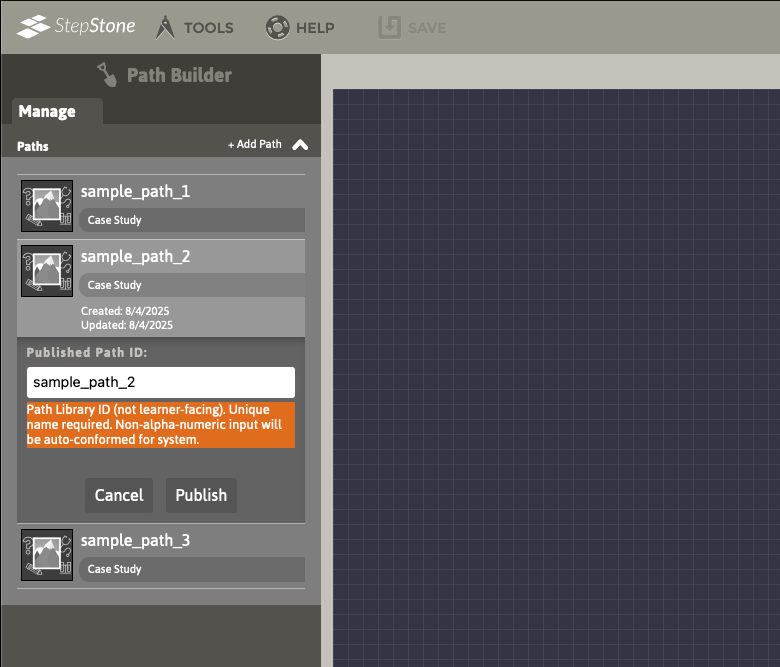
If a Path with the entered ID value has already been published to the account’s parent Author Pool, the dialog will flash a warning, indicating that this Path ID either already exists in the Pool, or is otherwise invalid. Change the Path ID (for example, if publishing subsequent “versions” of a Path, you may add an incrementing number to the end, etc.) and click Publish again.
After successful publishing, use the Course Packager to add the published Paths to new or existing Courses.
View a tutorial video for more information on these topics.